Oracle GoldenGate là một giải pháp sao chép và đồng bộ dữ liệu mạnh mẽ được phát triển bởi Oracle Corporation. Nó cho phép sao chép dữ liệu giữa các cơ sở dữ liệu khác nhau mà không làm gián đoạn hoạt động của hệ thống, đồng thời hỗ trợ nhiều hình thức sao chép khác nhau, bao gồm sao chép online (online capture), sao chép dựa trên redo log, và sao chép đa chiều (multimaster replication)
Download bộ cài OGG tương ứng tại:
https://edelivery.oracle.com/osdc/faces/SoftwareDelivery
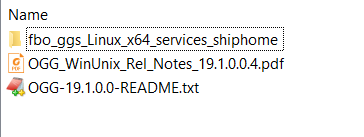
Tải về sẽ được file này: goldengate-19.1.0.0.4-microservices-linux-x86-64.zip

Kiến trúc OGG có 2 loại:
Classic và Microservices, trong đó Microservices là kiến trúc mới có nhiều ưu viêt hơn bản cũ
Trong bài viết này chúng ta sẽ cùng nhau cài đặt và cấu hình phiên bản OGG Microservices
Mục tiêu: Đồng bộ dữ liệu giữa 2 DB nguồn và đích
Trên 2 node nguồn và đích được cài đặt các thông số như bên dưới database 19c
Thực hiện trên máy ảo VirtualBox
| Items |
DB nguồn – source |
DB đích – target |
| hostname |
oggsource |
oggtarget |
| ip |
192.168.68.11 |
192.168.68.12 |
| db name |
duosource |
duotarget |
| version DB |
19.3 |
19.3 |
| DB_HOME |
/u01/app/oracle/product/ 19.3.0/dbhome_1 |
/u01/app/oracle/product/ 19.3.0/dbhome_1 |
| DB_BASE |
/u01/app/oracle |
/u01/app/oracle |
| OGGhome |
/u01/app/oracle/product/gghome |
/u01/app/oracle/product/gghome |
Đổi hostname:
hostnamectl set-hostname oggsource.local

hostnamectl set-hostname oggtarget.local
TRÊN CẢ 02 NODE NGUỒN VÀ ĐÍCH:
Vào thư mục product của oracle tạo thư mục home goldengate:
Login với user Oracle vào OS
cd /u01/app/oracle/product

mkdir gghome

mkdir gghome_sm

mkdir gghome_deploy
* gghome: chứa bộ cài
* gghome_sm: services management
* gghome_deploy: thực hiện deploy
Giải nén bộ cài OGG vào thư mục setup trong home: cả 2DB
Copy bộ cài từ Window vào trong máy ảo VTB sử dụng MobaX hoặc bất cứ phần mềm nào cũng được, lưu trữ trong /home/oracle
cd /home/oracle

unzip goldengate-19.1.0.0.4-microservices-linux-x86-64.zip
Thêm biến môi trường cho OGG vào trong file bash_profile của user oracle cả 2 DB
vi .bash_profile
## add thêm nội dung này vào bên dưới
export GGATE=/u01/app/oracle/product/gghome

export LD_LIBRARY_PATH=$ORACLE_HOME/lib:$GGATE

export TNS_HOME=/u01/app/oracle/product/19.3.0/dbhome_1/network/admin
Chạy lại biến môi trường để apply cài đặt
cd
. .bash_profile
Cài đặt phần mềm OGG
cd /home/oracle/fbo_ggs_Linux_x64_services_shiphome/Disk1/

./runInstaller
(nếu thông báo lỗi DISPLAY thì tiến hành chạy biến môi trường sau: thay IP thành IP máy hiện tại của bạn nhé.
export DISPLAY=192.168.68.222:0.0)
chọn đường dẫn cài đặt Soft OGG đã tạo ở bên trên:
/u01/app/oracle/product/gghome
Trên target làm tương tự
Cài đặt soft OGG thành công
CẤU HÌNH OGG (thực hiện đồng thời các bước bên dưới trên 2 node)
Tạo đường dẫn phục vụ cài đặt đồng bộ
cd $GGATE

mkdir -p /u01/app/oracle/product/gghome/var/log
Kiểm tra chế độ archivelog và bật nếu chưa bật
sqlplus / as sysdba

startup

archive log list;
select name,log_mode,force_logging from v$database;

alter database archivelog;
Kiểm tra chế độ force logging và bật nếu chưa bật
select name,log_mode,force_logging from v$database;

alter database force logging;
Kiểm tra chế độ supplemental log và bật nếu chưa bật
select name,supplemental_log_data_min,supplemental_log_data_pk,supplemental_log_data_ui,supplemental_log_data_fk,supplemental_log_data_all from v$database;
alter database add supplemental log data;

alter database add supplemental log data (primary key) columns;

alter database add supplemental log data (foreign key) columns;

alter database add supplemental log data (all) columns;

alter database add supplemental log data (unique index) columns;

alter system switch logfile;
Kiểm tra chế độ enable_goldengate_replication và bật nếu chưa bật
select name, value from v$system_parameter where name = 'enable_goldengate_replication';

alter system set enable_goldengate_replication = true scope = both;
Tạo tablespace lưu data đồng bộ của OGG
create tablespace ggs_data datafile size 100m autoextend on next 10m maxsize unlimited;
Tạo USER sử dụng cho OGG phục vụ đồng bộ
create user ggadmin identified by oracle default tablespace ggs_data temporary tablespace temp quota unlimited on ggs_data;
Gán quyền cần thiết cho user bên trên
grant create session, connect, resource, alter system to ggadmin;

exec dbms_goldengate_auth.grant_admin_privilege('ggadmin');

EXEC DBMS_GOLDENGATE_AUTH.GRANT_ADMIN_PRIVILEGE(grantee=>'ggadmin', privilege_type=>'CAPTURE', grant_optional_privileges=>'*');

grant select any dictionary, select any table to ggadmin;

grant create table to ggadmin;

grant flashback any table to ggadmin;

grant execute on dbms_flashback to ggadmin;

grant execute on utl_file to ggadmin;

grant select any table to ggadmin;

grant create any table to ggadmin;

grant insert any table to ggadmin;

grant update any table to ggadmin;

grant delete any table to ggadmin;

grant drop any table to ggadmin;

grant alter any table to ggadmin;

grant lock any table to ggadmin;

grant select any transaction to ggadmin;

exec dbms_streams_auth.grant_admin_privilege('ggadmin');

grant insert on system.logmnr_restart_ckpt$ to ggadmin;

grant update on sys.streams$_capture_process to ggadmin;

grant become user to ggadmin;
Config streams_pool_size chứa thông tin đồng bộ: (chú ý streams_pool_size phải nhỏ hơn memory_target)
alter system set streams_pool_size=1024M scope=spfile;
Tắt DB, khởi động lại OS:
shutdown immediate
restart OS
CHẠY CÀI ĐẶT ./OGGCA.SH
sqlplus / as sysdba
startup
exit
cd $GGATE/bin
./oggca.sh
–giao diện cài đặt xuất hiện => chon đường dẫn tới sm_dir (services management) vừa tạo ở bên trên trong mục service manager deployment home
/u01/app/oracle/product/gghome_sm
–tích chọn register service manager as…
–chọn XAG nếu DB đang chạy là RAC
–nhập IP máy source chính là máy hiện tại
source:
192.168.68.11
target:
192.168.68.12
–Listening port: 7000 (source and target is the same)
7000
–trong phần deployment name chọn đặt tên bất kỳ
source:
deploy_source
target:
deploy_target
–Không tích chọn sharding
–Chọn đường dẫn gghome
/u01/app/oracle/product/gghome
–chọn deployment home đã tạo ở bên trên
/u01/app/oracle/product/gghome_deploy
–chọn customize directories hoặc là KO chọn, để mặc định
–TNS admin
/u01/app/oracle/product/19.3.0/dbhome_1/network/admin
–tạo username, pass để login vào quản trị OGG web
admin/Oracle111@
–Bỏ chọn SSL/TLS
–Port settings
Administration server port: 7001
Distribution server port: 7002
Receiver server port: 7003
Enable monitoring
Metrics server port: 7004
Metrics server UDP port (data): 7005
Metrics server Datastore type: BDB
Metrics server Datastore home:
–nhập thông tin schema muốn đồng bộ => phải tạo schema trước, vidu: ggadmin
GGADMIN
–run file .sh với quyền root
/u01/app/oracle/product/gghome_sm/bin/registerServiceManager.sh
=>> Thực hiện tương tự các bước trên cho Node target
Trên Node DBSOURCE:
Tạo user và table để test data:
sqlplus / as sysdba

create user duo identified by oracle default tablespace ggs_data temporary tablespace temp quota unlimited on ggs_data;

grant connect, resource to duo;

create table duo.tab (id number, data varchar(100));

alter table duo.tab add primary key (id);
–bảng bắt buộc phải có PK, nếu không OGG đồng bộ sẽ phát sinh lỗi không xác định và sẽ bị abended status của REP, EXT, PUMP…
–insert data vào tab
insert into duo.tab values (1,'duo nguyen 1');

insert into duo.tab values (2,'duo nguyen 2');

insert into duo.tab values (3,'duo nguyen 3');

commit;
set lines 999;
select * from duo.tab;
TRÊN NODE DBTARGET:
Tạo user và table để chứa data đồng bộ từ source sang:
sqlplus / as sysdba

create user tom identified by oracle default tablespace ggs_data temporary tablespace temp quota unlimited on ggs_data;

grant connect, resource to tom;

create table tom.tab (id number, data varchar(100));

alter table tom.tab add primary key (id);
— hoặc phải tạo hết table, primary key trước khi tạo extract, replicat ko là hệ thống sẽ hiểu là chúng ta đang thực hiện DDL trên bảng nguồn vì extract cả DDL => lệnh alter add primary key sẽ được thực hiện trên bảng đích mà hiện tại bảng đích lại có key rồi => sẽ báo lỗi
set lines 999;
select * from tom.tab;
=>> hiện tại bảng đích là tom.tab có cấu trúc giống bảng nguồn nhưng chưa có data
SQL> select * from tom.tab;

no rows selected
–bảng bắt buộc phải có PK, nếu không OGG đồng bộ sẽ phát sinh lỗi không xác định và sẽ bị abended status của REP, EXT, PUMP…
— 2 bảng DB nguồn và đích phải giống hệt nhau về cấu trúc, cột, key….
BẮT ĐẦU CẤU HÌNH OGG ĐỒNG BỘ DỮ LIỆU GIỮA 2 BẢNG TRÊN 2 NODE KHÁC NHAU
DBSOURCE:
Login vào và bắt đầu tạo extract transaction, trail:
–login vào DB web:
192.168.68.11:7001
admin/Oracle111@
— góc trái bên trên => configuration => credential => click add new và thêm thông tin
credential domain: blank
credential alias: source_cre
user id: ggadmin
password: oracle
–submit
–click icon login database và thêm schema, table vào quá trình extract (có thể thực hiện extract được schema, table, procedure) trong phần transaction infomation chon table click thêm mới +, điền thông tin table
Table Name: DUO.TAB
All Columns: yes (active)
–nếu có thêm bảng thì thực hiện add thêm bấy nhiêu bảng theo nhu cầu thực tế, làm tương tự như bên trên
— các thông số khác để mặc định
–sau đó submit
— góc trái bên trên => Overview => bên trái trong mục EXTRACT click + (thêm mới)
Chọn Intergrated Extract
Process Name: EXT1
Description:
Intent: unidirectional
Credential Domain: OracleGoldenGate
Credential Alias: source_cre
Begin: now
Trail Name: AA
=>>các thông số khác để mặc định
–sau đó click next chuyển sang parameter file (chúng ta sửa file này theo ý muốn, thêm vào cuối file bên dưới dòng ‘exttrail AA’:
LOGALLSUPCOLS
DDL INCLUDE MAPPED
TABLE DUO.TAB;
–nếu có nhiều bảng thì chúng ta thêm vào bên dưới như sau:
TABLE DUO.TAB1;
TABLE DUO.TAB2;
TABLE DUO.TAB3;
click register extract in the background
— create and run
DBTARGET:
Login tạo checkpointtable va REP:
–login vào DB web:
192.168.68.12:7001
admin/Oracle111@
— góc trái bên trên => configuration => credentials => click add new và thêm thông tin
credential domain: blank
credential alias: target_cre
user id: ggadmin
password: oracle
submit
–click login database with user ggadmin
–trong phần checkpoint click add new => checkpoint table
ggadmin.checkpt
–sau đó submit
— vào phần Overview
–trong phần replicats bên tay phải phía trên click + => integrated replicat => next
process name: REP1
description:
intent: unidirectional
credential domain: OracleGoldenGate
credential alias: target_cre
begin: position in log
trail name: BB
–next parameter file
–thay nội dung dòng cuối bên dưới (MAP *.*, TARGET *.*;) bằng dòng này
DDL INCLUDE MAPPED
MAP DUO.TAB, TARGET TOM.TAB;
–nếu có nhiều bảng thì chúng ta thêm vào bên dưới như sau:
MAP DUO.TAB1, TARGET TOM.TAB1;
MAP DUO.TAB2, TARGET TOM.TAB2;
MAP DUO.TAB3, TARGET TOM.TAB3;
— create and run
DBSOURCE:
Login vào và bắt đầu tạo distribuition:
–trong phần port 7002 (distribuition server) click + tạo mới
http://192.168.68.11:7002/
path name: DIST1
description:
source: EXT1, AA
target:—
ogg
host: 192.168.68.12
port: 7003
BB
— create and run
TEST DỊCH VỤ
DBsource:
Kiểm tra 2 bảng trước và sau đồng bộ xem data đã di chuyển từ DBsource sang DBtarget hay chưa?
sqlplus / as sysdba

select count(*) from duo.tab;

select count(*) from TOM.tab;

select * from duo.tab order by id;
–dữ liệu cũ từ DBsource đã đồng bộ 100% sang Dbtarget ??? => Không vì chỉ đồng bộ được dữ liệu thêm vào sau khi tiến trình extract và replicat được active…
— chỉ đồng bộ được dữ liệu từ thời điểm này về sau mà thôi
— thời điểm trước thì phải import datapump
Tiến hành insert, update, truncate, delete bảng ở DBsource và xem kết quả ở DBtarget xem có thay đổi không nhé:
insert into duo.tab values (4,'duo nguyen 4');

insert into duo.tab values (6,'duo nguyen 6');

insert into duo.tab values (7,'duo nguyen 7');

insert into duo.tab values (8,'duo nguyen 888');

insert into duo.tab values (9,'duo nguyen 999');
commit;
DBTARGET:
select count(*) from TOM.tab;

select * from TOM.tab;
=>> đã nhận được đồng bộ dữ liệu từ DBsource sang
Thủ tục add cả schema vào extract, pump…
Tạo mới schema (user) trên cả 2 DB, nghĩa là 2 schema trên 2 db phải giống nhau
sqlplus / as sysdba
create user user_new identified by user_new;

grant connect, resource to user_new;

alter user user_new quota unlimited on users;
–trên cả 2 DB giống nhau nhé
Ghi chú:
Các user (schema) trên 2 DB phải có quyền giống nhau
Nếu bạn đồng bộ tên của 2 schema khác nhau thì thêm dòng dưới vào trong file replicat ở DB target để hệ thống có thể tự tạo DDL trên 2 schema khác nhau được.
DDLOPTIONS MAPSESSIONSCHEMA source_schema TARGET target_schema;
ví dụ:
DDLOPTIONS MAPSESSIONSCHEMA FOX TARGET TOM;
Nếu muốn đồng bộ DB đã có dữ liệu rồi => chúng ta thực hiện export datapump trên DB nguồn rồi import vào DB đích => sau đó làm các thủ tục bên trên đồng bộ từ hiện tại
Uninstall GoldenGate
If you need to uninstall GoldenGate you can do it from inside the GG_HOME going to the directory deinstall and running the script deinstall.sh or deinstall.bat
 Give - Paymill Gateway
1 × Giá gốc là: 89.000 ₫.62.300 ₫Giá hiện tại là: 62.300 ₫.
Give - Paymill Gateway
1 × Giá gốc là: 89.000 ₫.62.300 ₫Giá hiện tại là: 62.300 ₫.  Give - Paymill Gateway
  Give - MailChimp
  Give - Braintree Gateway
  XL WooCommerce Sales Triggers
  WooCommerce Payson Form
  WooCommerce Drip
  WooCommerce Coupon Campaigns